 dApps
dAppsQuickstart
Api3 Market serves a large and dynamic catalog of data feeds on all major EVM networks. Follow this guide to learn how to use Api3 Market to integrate a data feed into an example contract.
Using Api3 Market
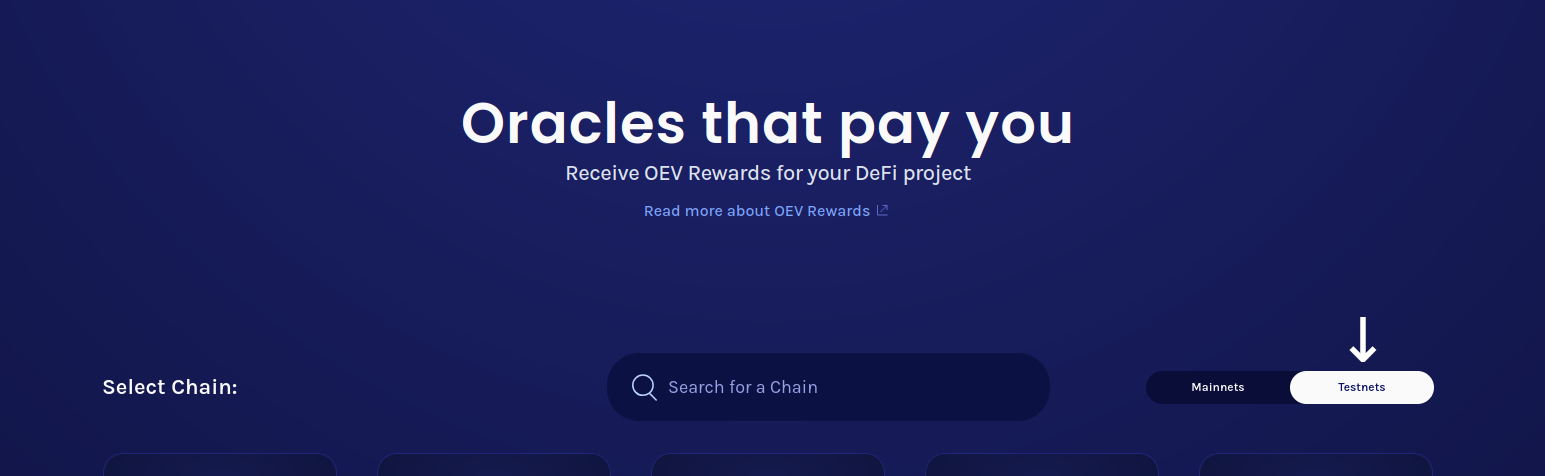
Go to market.api3.org.
Click the toggle button to view the testnets, and pick one where you have funds.
On the network page, you will see a search bar (1), some of the data feeds that are already active on the network under "Featured Feeds" (2), and a link to the catalog (3).
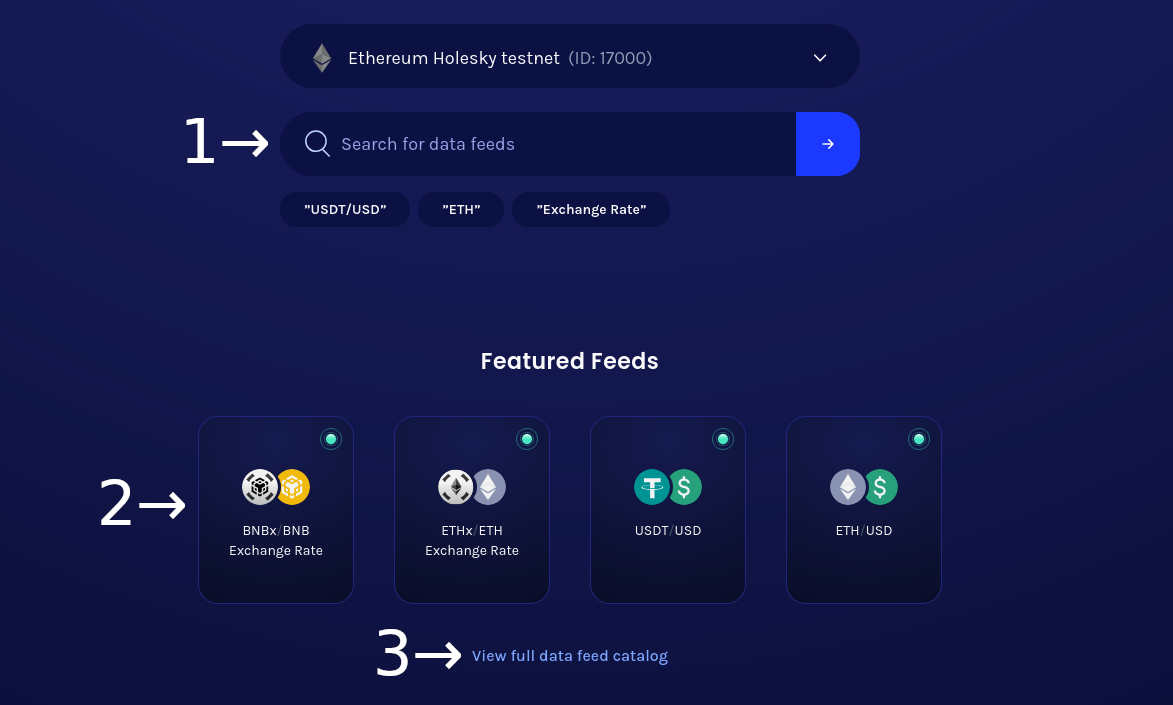
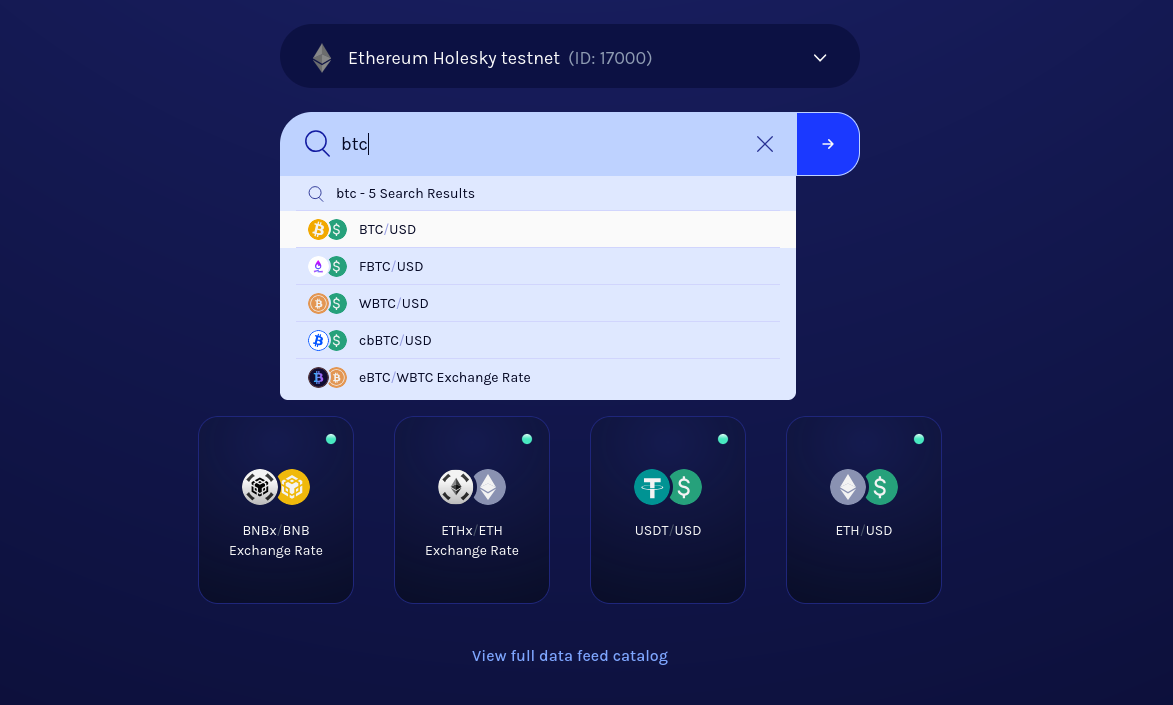
Start typing the name of a data feed in the search bar, and click it once it appears in the drop-down.
Alternatively, you can view the catalog and click the data feed there, which will be equivalent to searching the full name of the data feed.
💡 Tip
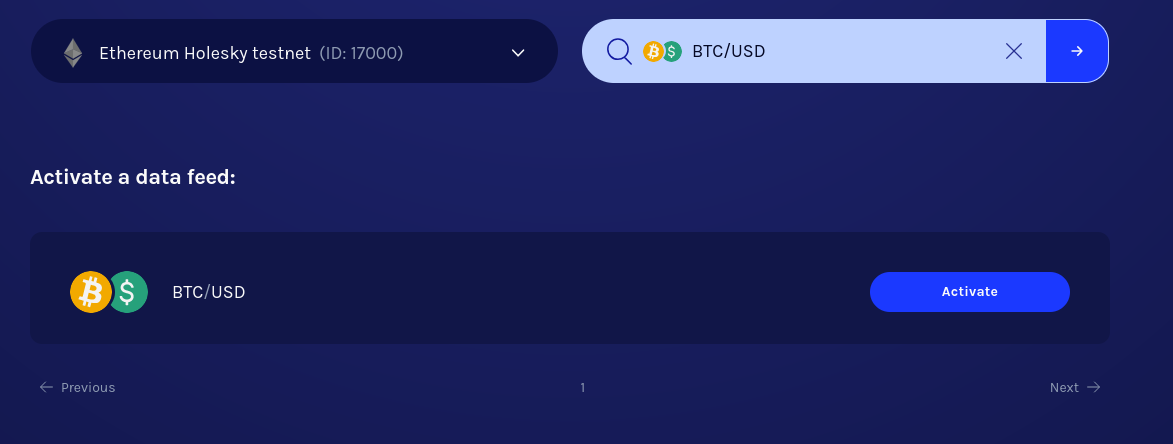
All data feeds are inactive by default. Purchasing a plan activates it until the plan expires. Everyone can use an active data feed. On the network page, active feeds appear as cards, and inactive feeds appear as rows with "Activate" buttons.
If you pick a data feed that is already active on the network, you will be taken to the data feed page directly. Otherwise, you will be taken to the activation page first. To experience the entire flow, we recommend picking a data feed that is not active.
If you have picked a data feed that is not active, you will be taken to the activation page next. Select the parameters, review the duration and price, and click the "Purchase" button to pay.
Once your purchase transaction is confirmed, you can proceed to view the data feed page. Leave this tab open, as we will come back to it later in the guide.
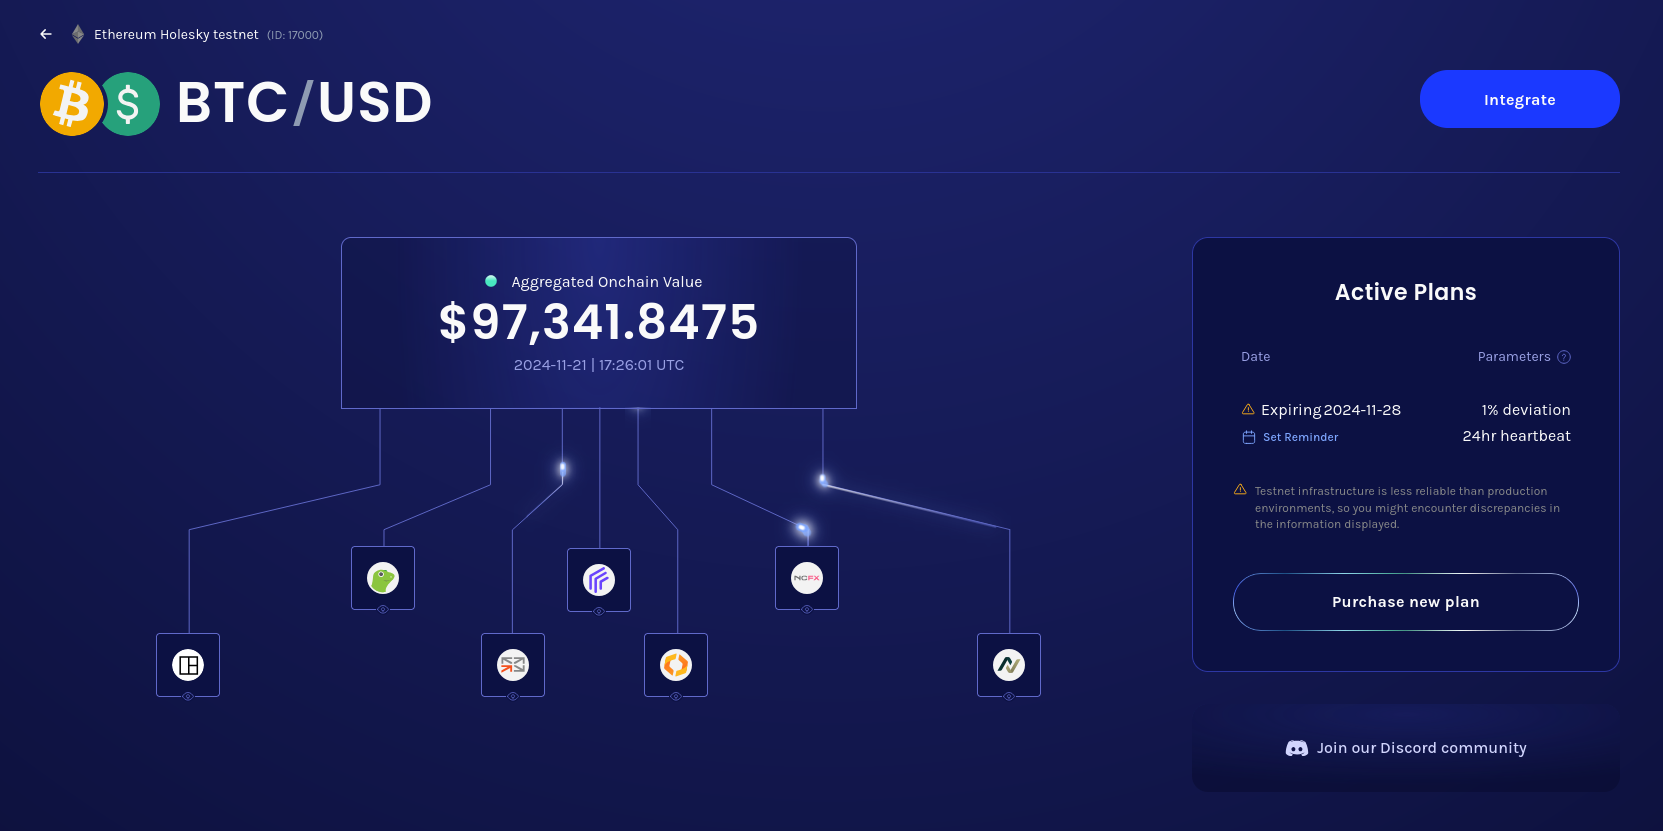
Congratulations! 🎉 You have successfully activated a data feed. Let's use it in an example contract now.
Remix example
💡 Tip
This section uses Remix IDE. If you prefer using Hardhat, you can clone data-feed-reader-example and follow the instructions in its README.
Go to Remix.
With the "File explorer" tab selected on the left sidebar, click the hamburger button and select "Clone".
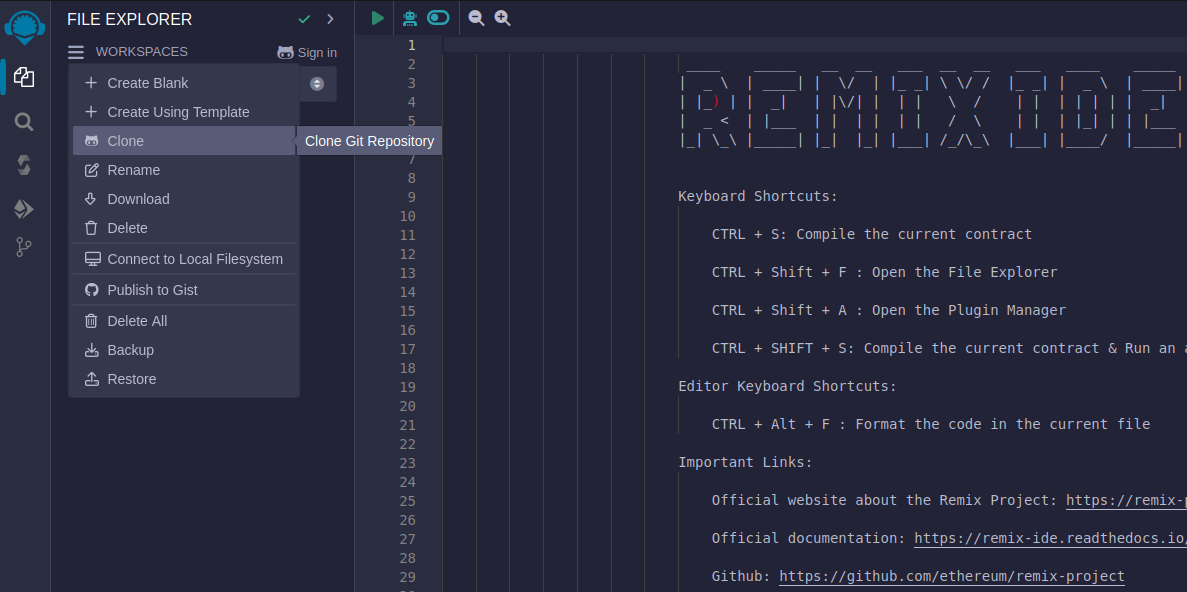
Enter
https://github.com/api3dao/data-feed-reader-exampleand click "OK".With the "File explorer" tab selected on the left sidebar, double-click
contracts/to expand it, then clickDataFeedReaderExample.sol.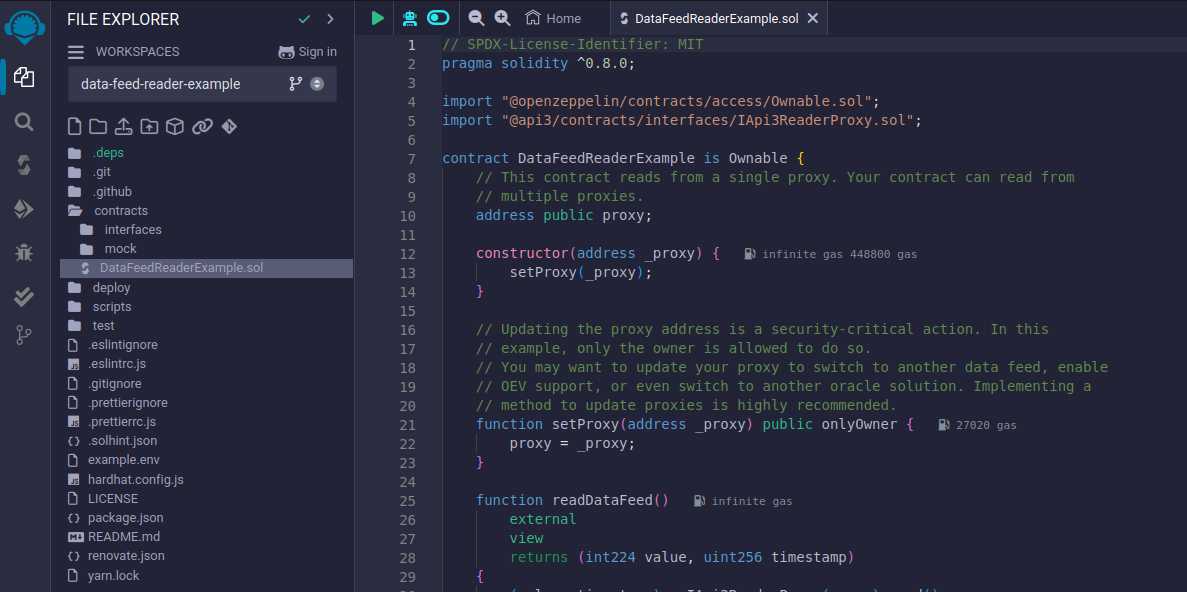
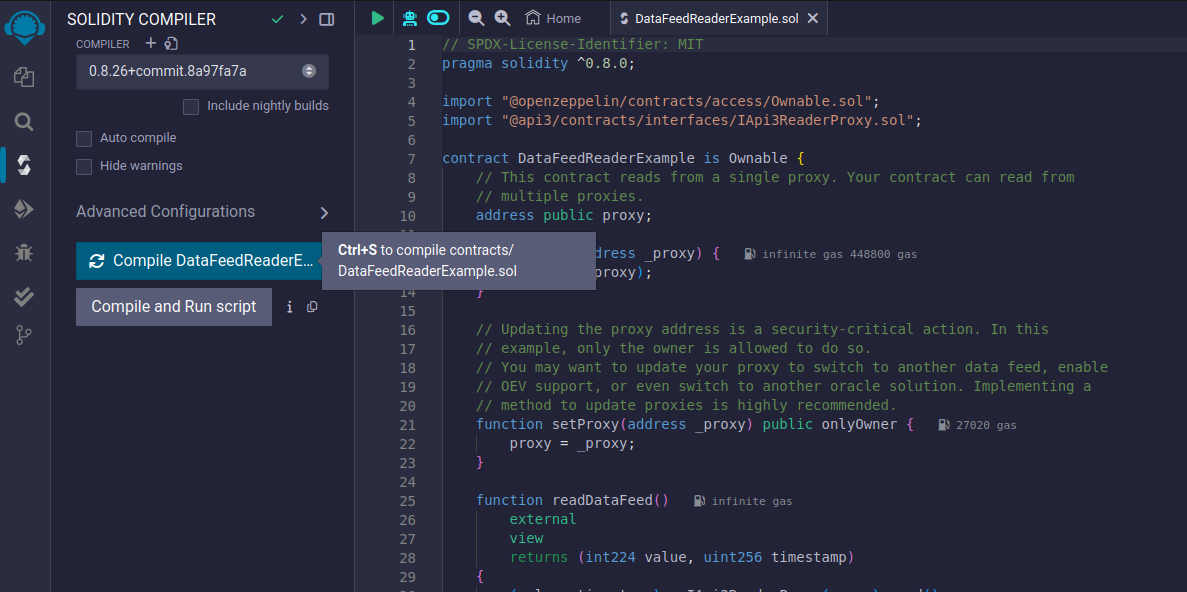
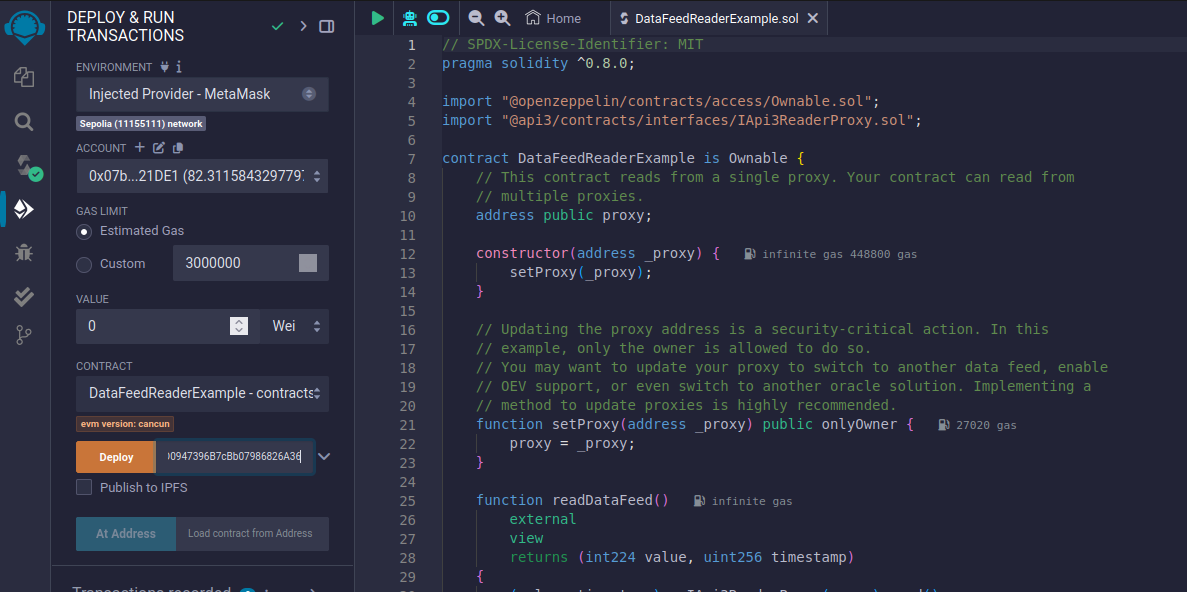
With the "Solidity compiler" tab selected on the left sidebar, click "Compile DataFeedReaderExample".
With the "Deploy & run transactions" tab selected on the left sidebar, select "Injected Provider - MetaMask" from the "Environment" drop-down.

💡 Tip
If you just purchased a plan on Api3 Market, your MetaMask wallet should be connected to the correct network. If not, ensure your wallet is connected to the network where the data feed exists, where we'll deploy DataFeedReaderExample.
Return to the data feed page on Api3 Market and click "Integrate".
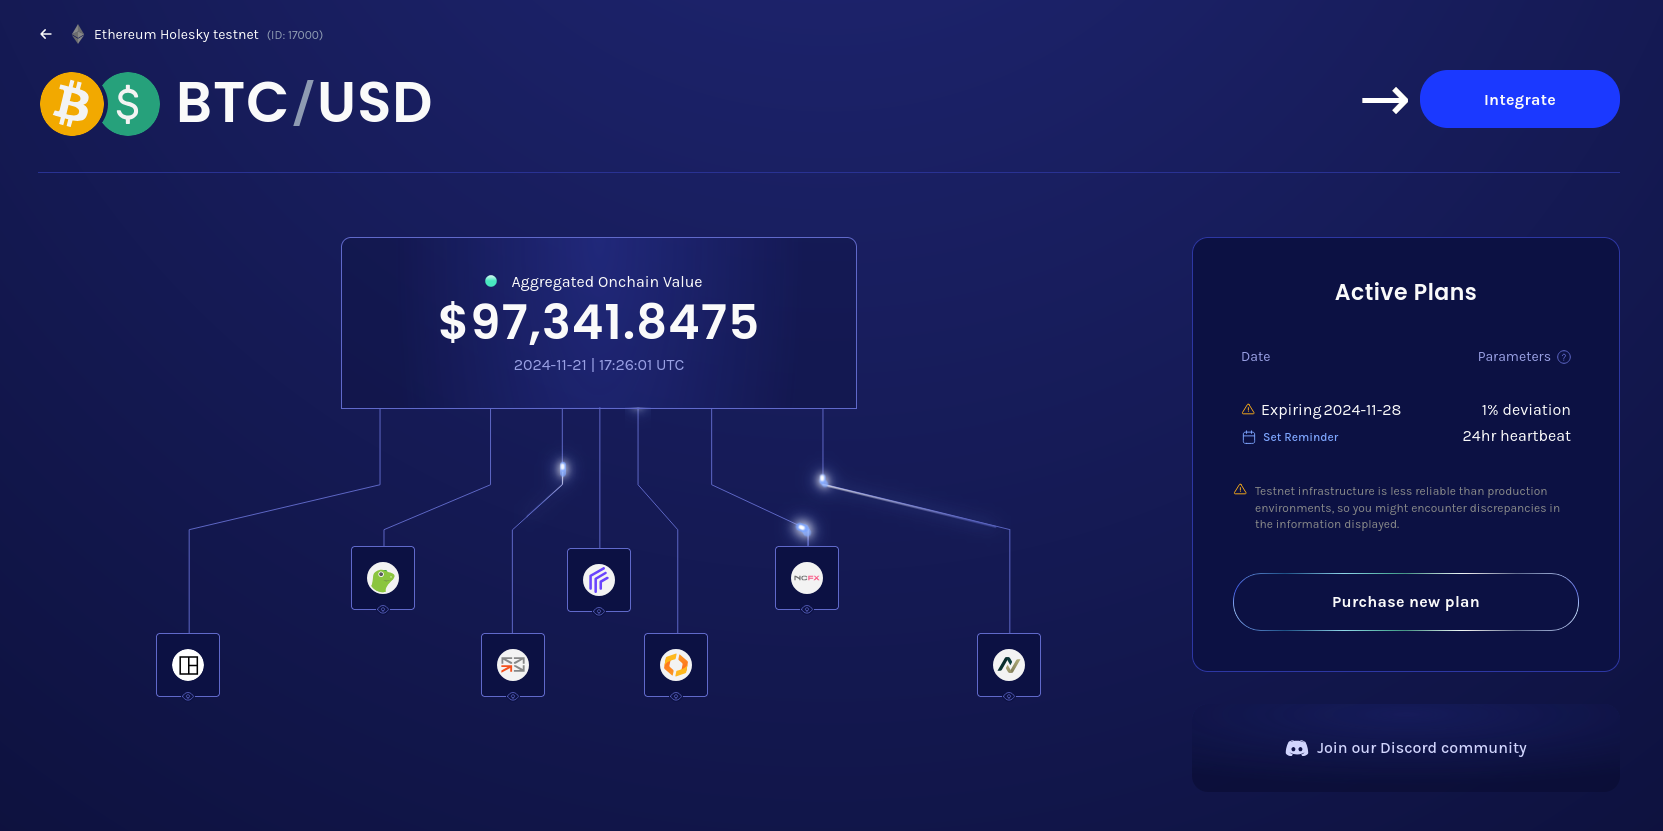
Click the copy icon next to the displayed Api3ReaderProxyV1 address. Please note that OEV Rewards is disabled on testnets. For information about using this selection on mainnets, refer to this section.
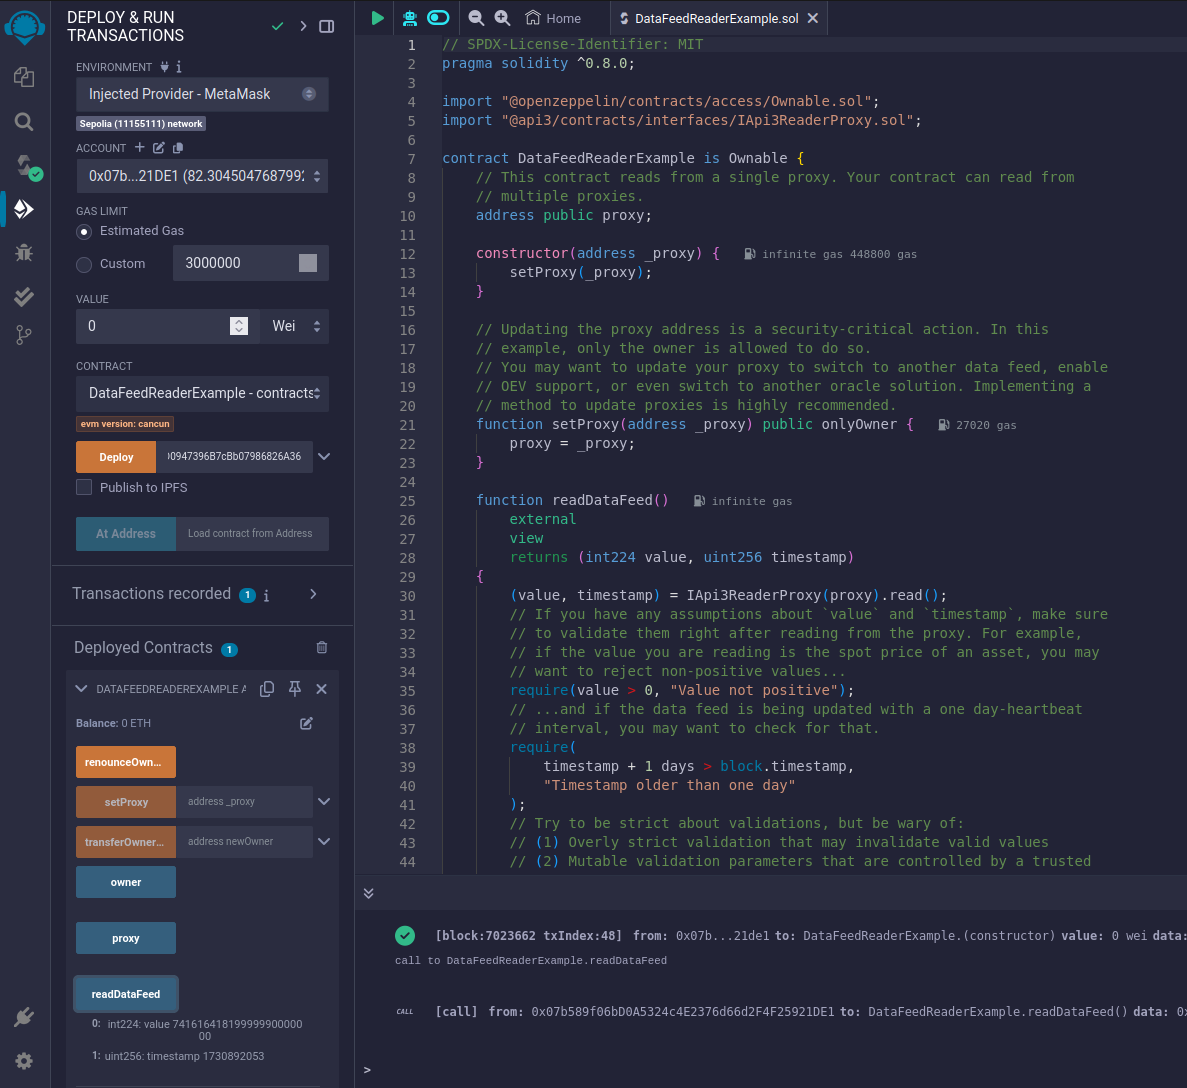
Return to Remix IDE. With the "Deploy & run transactions" tab selected on the left sidebar, paste the Api3ReaderProxyV1 address into the textbox next to the "Deploy" button, then click the button.
After the transaction is confirmed, you can call the publicly accessible functions of DataFeedReaderExample. Under "Deployed Contracts", expand 'DATAFEEDREADEREXAMPLE AT ...', then click "readDataFeed". You'll see the values that DataFeedReaderExample reads from Api3ReaderProxyV1.
What next?
This guide should help you get started with a hackathon project. For production use of Api3 data feeds, please continue to the integration section. You can also learn how to get paid for using Api3 data feeds.